HomeAssistant releases new updates very regularly. Each month there is a new release which usually receives several patch releases as well. If you want to keep up with updates or even update automatically, it’s nice to get notified upon the release of an update.
Prerequisites
HomeAssistant has a built-in updater sensor which automatically checks for the updates and changes state, if it finds one. This can be used as trigger in an automation. The automation’s action can do all kinds of things; e.g. send a notification to a phone, which has the HomeAssistant app installed.
Having installed the HomeAssistant app on your phone, you can send notifications to it via HomeAssistant - including from an automation. The Mobile app integration must be enabled for this to work - it is by default.
If you want to be extra sure that the notification always arrives immediately, I’d suggest deactivating any battery optimization for the HomeAssistant app - at least on the recent versions of Android that goes for pretty much any app that sends notifications which you want to be sure to get without waking your phone from doze.
You can do it in the system settings; depending on the Android variant the path in the settings might vary but usually it’s here: Apps -> See all apps -> HomeAssistant -> Advanced -> Battery optimization -> Don’t optimize.
Automation
Using the updater sensor and app notification functionality, one can built an automation which sends a notification upon state change of binary_sensor.updater. You can find my automation snippet on GitHub.
The automation uses the most recent version’s number in it’s output text - this is accomplished by referencing an attribute of binary_sensor.updater called newest_version. You can change the notification’s content as you please by modifying the attributes below action -> data in the snippet.
Unless you have the exact same phone model as me, you must change the service in the automation’s action. In my case it’s set to notify.mobile_app_oneplus_nord_n105g - you must change it to your phone after having installed the HomeAssistant app and registered it with your instance.
The ID of your phone inside HomeAssistant can be found by opening the list of integrations <your homeassistant instance ip or hostname>/config/integrations, finding your phone there and clicking on the blue link ... entities. In the entity list, you’ll find a column called Entity ID and copy the phone’s name from there, replacing anything before the dot with notify as seen in the automation snippet.
The automation can be tested by setting the state of binary_sensor.updater from off to on in the HomeAssistant Developer Tools: <your homeassistant instance ip or hostname>/developer-tools/state
If the state was already on, you need to set it to off first.
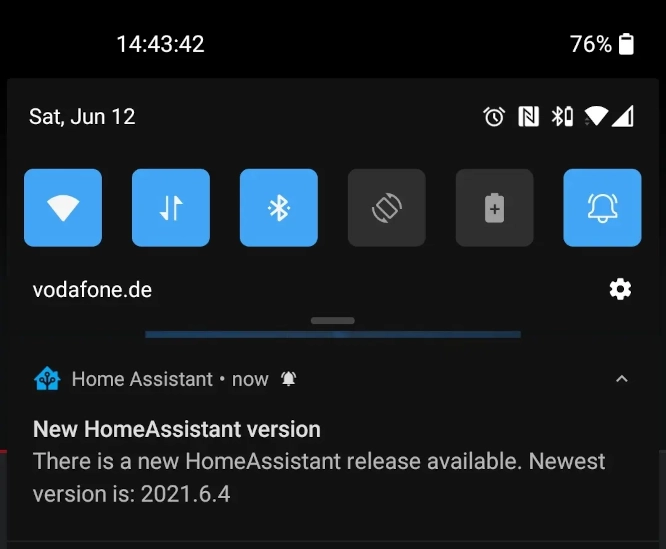
The state change to on should trigger the automation and produce a notification like so:

Activation switch
Usually I also add a switch (“boolean input”) to my automations so I can quickly toggle functionalities from the HomeAssistant dashboard separate from the Automations config section. The code snippet for that can be found on GitHub as well.
It’s being referenced in the automation snippet, so you need to either add this switch as well as the automation or remove the relevant lines, if you don’t want the switch.
Having added it to a card called “Notifications”, it looks like this in the HomeAssistant dashboard:
